The Glass Fusing Project Log Book: Your Blueprint for Repeatable Success in the Studio
Every glass fuser knows the feeling. You open the kiln after a long, slow cool-down, and there it is—a piece that exceeds your expectations. The colors sang together. The tack fuse was perfectly crisp. That tricky striker you’ve been wrestling with finally revealed its full potential. You feel a surge of pride and immediately think, “I need to do this again.” But then the question hits: How exactly did I get here?
In the heat of the studio, it’s easy to rely on memory. But memory is a notoriously unreliable kiln companion. The ramp rate you used, the exact soak time, the position of the shelf in the kiln, the specific batch number of that striking glass—these details fade quickly. This is exactly why a dedicated Glass Fusing Project Log Book is not a luxury; it is the most practical tool you can own for consistent, measurable progress in your craft.
Whether you are a beginner trying to reproduce a technique from a weekend workshop or an advanced artist fine-tuning complex multi-layer firings, a structured log transforms your studio practice from a series of hopeful guesses into a deliberate, repeatable process. This article explores how a simple journal—specifically a well-designed Glass Fusing Project Log Book with 120 pages and a convenient 6 x 9 inch format—can become the backbone of your creative workflow. We will look at how to use it not just for notes, but as a living document of your unique kiln’s personality, your material experiments, and your personal artistic evolution.
Why Your Kiln Needs a Personality File, Not Just a Manual
No two kilns fire exactly alike. Even if you own the same model as a friend down the street, differences in element age, thermocouple placement, ambient room temperature, and even the type of shelf you use will produce variations in your results. This is the first and most important reason to adopt a Glass Fusing Project Log Book. You are not just recording what you did; you are building a detailed profile of your specific kiln’s quirks.
Consider this scenario: You take a class where the instructor fires a particular reactive glass combination using a medium-speed cool-down. The result is a beautiful, subtle halo of color. You go home, replicate the schedule exactly, and get something completely different—muddy, or over-fired, or lacking that halo entirely. What happened? Your kiln might hold heat longer, or it might cool faster near the top. Without a log, you have no way to pinpoint the variable.
A good log entry captures more than just the schedule. It records:
- The exact position of the piece in the kiln (top shelf, middle, bottom, centered, off to one side).
- The type and brand of glass used, including batch numbers if available.
- The condition of your kiln wash or shelf paper.
- Any notable ambient conditions (a cold garage in winter vs. a warm studio in summer).
- A physical or digital image of the outcome.
Over time, patterns emerge. You might notice that your kiln consistently fires 25 degrees hotter on the right side, or that a specific striker only reaches its intended color if you extend the anneal soak. This is knowledge you cannot get from a textbook. It is your kiln’s language, and the Glass Fusing Project Log Book is your translation guide.
Bridging the Gap Between Classroom and Studio
One of the most frustrating transitions in glass fusing is taking a technique you learned in a structured class and getting it to work in your own, less predictable environment. Instructors often work on optimized kilns with well-known firing profiles. When you return to your studio, the variables multiply. The Glass Fusing Project Log Book is explicitly designed to help you bridge this gap.
When you take a class, you should bring your log or use the provided JPEG and PDF files from the log book’s digital companion to print extra pages. During the demo, note not just the schedule the instructor calls out, but also the visual cues. What did the glass look like just before it entered the kiln? How did it change during the ramp? Did the instructor tap the kiln at a certain point to release bubbles? These observations are pure gold.
Back in your own studio, your log becomes a checklist. You can attempt to reproduce the piece using the exact same materials and schedule. Then, crucially, you can tweak one variable at a time. The log allows you to run controlled experiments: “I will use the exact same schedule but move the piece from the center shelf to the top shelf. I will log the difference in surface texture and color saturation.” Over three or four entries, you will have developed a reliable adaptation of the class technique for your kiln.
The 120 pages in this log book are not a limitation; they represent 120 opportunities to refine a single skill or explore a dozen different techniques. Each page is a dedicated space to document, reflect, and plan your next move.
Documenting the Unpredictable: Strikers, Reactions, and Process Experiments
Some of the most exciting work in glass fusing comes from materials that are inherently unpredictable. Striking glasses, reactive glasses, and intricate processes like bubble chasing or murrini fusing require meticulous record-keeping. This is where the Glass Fusing Project Log Book transitions from a simple diary into a laboratory notebook.
Striking glasses, in particular, are temperamental. Their final color depends on the peak temperature, the length of the hold, and the cooling rate. A difference of ten degrees or five minutes can shift a color from a soft pink to a deep rose or from a pale yellow to a striking orange. To master these materials, you must track your experiments systematically. A log entry for a striker experiment should include:
- The glass manufacturer and color name or code.
- The thickness of the glass and any layering.
- The exact firing schedule with ramp rates, hold temperatures, and hold durations.
- The observed color at each stage (if you peek through the spyhole).
- A before-and-after note or photograph.
Similarly, reactive glasses—those that interact with each other or with metals like copper or silver—demand careful documentation. You might test the same two reactive colors at three different peak temperatures to see how the reaction changes. Each test gets its own page in the log. Over time, you build a personal reference chart that is far more useful than any generic guide because it reflects your materials, your kiln, and your aesthetic preferences.
Process experiments also benefit immensely from logging. Are you trying to achieve a specific tack fuse texture? Are you experimenting with different shelf primers? Are you testing how long you can hold a strike before the glass becomes too devitrified? Each of these variables can be isolated, tested, and recorded in the log. The Glass Fusing Project Log Book provides the structure to ask better questions and get clearer answers.
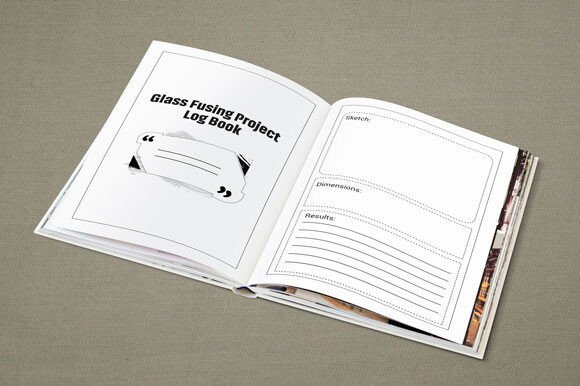
Visual Documentation: Sketching and Photography
Words are powerful, but in glass fusing, an image often says more than a paragraph of description. The Glass Fusing Project Log Book encourages you to include visual elements in your entries. You can sketch your planned design before firing, noting dimensions and layer placement. After firing, you can paste in a printed photo or simply make a quick sketch of the result.
Why is this important? Because glass is a visual medium. Your notes might say “opalescent white over transparent teal,” but a sketch shows exactly how those colors interacted, where the glass flowed, and how light passed through the piece. A before-and-after image pair is invaluable for understanding how your design translated through the firing process.
Many glass artists use the digital components of this log book—the included PDF and JPEG files—to create a hybrid system. They print pages for their physical binder or use the JPEG files to insert images directly into a digital note-taking app. This flexibility means the log book adapts to your workflow, whether you prefer pen and paper, a tablet, or a combination of both.
Repeat Great Results and Avoid Costly Mistakes
The ultimate goal of any log book is to make your successes reproducible and your failures instructive. Without a log, you are essentially gambling every time you load the kiln. With a structured Glass Fusing Project Log Book, you stack the odds in your favor.
Let’s look at a common mistake: devitrification. It happens to every fuser at some point. You open the kiln to find a cloudy, scummy surface on what should have been a glossy piece. Frustrating, yes, but also a learning opportunity if you document it. What was the firing schedule? Was the kiln clean? Did you apply kiln wash properly? Was the room humid? By logging the circumstances around the failure, you can identify the cause and avoid repeating it.
Conversely, when you achieve a beautiful result, a thorough log entry ensures you can recreate it. Maybe you accidentally held at 1250°F for an extra ten minutes because you got distracted, and that accidentally produced a gorgeous surface texture. If you log it, that “mistake” becomes a discoverable technique. You can deliberately repeat it in the future, or you can tweak it to see if a shorter hold produces a different effect.
The 6 x 9 inch size of this log book is also worth noting. It is compact enough to sit on your kiln shelf or workbench without taking up too much space, yet large enough to write detailed notes and include sketches. It travels well to classes and studio sessions. The 120 pages provide a substantial but not overwhelming amount of space—enough for a year or more of regular studio work, depending on how frequently you fire.
Practical Recommendations for Getting Started
If you are new to using a project log, start simple. You do not need to fill every field on the page. The act of writing down the date, the materials, and the schedule is itself a powerful habit. Over time, you will naturally start adding more detail. Here are a few recommendations to make the most of your Glass Fusing Project Log Book:
- Keep it accessible. Place the log book near your kiln controls and your glass cutting table. If it is out of sight, you will forget to use it.
- Write before you fire. Document your intention, your materials, and your planned schedule before you load the kiln. This forces you to think deliberately about what you are doing.
- Add notes after firing. As soon as the kiln is cool enough to open, take a photo and write your observations. Fresh impressions are the most accurate.
- Review periodically. Every few months, flip through your log. Look for patterns. What works consistently? What needs more experimentation? Let the book guide your next projects.
- Use the digital files. The included PDF and JPEG files allow you to print extra pages if you fill the book, or to digitize your entries for backup and easy searching. This combination of physical and digital makes the system robust.
In a medium where heat, time, and chemistry collide, documentation is your anchor. The Glass Fusing Project Log Book is not about being a meticulous archivist for its own sake. It is about giving yourself the freedom to experiment boldly, knowing that you have a reliable system to capture what works and learn from what doesn’t. Whether you are chasing the perfect strike, refining a class technique, or simply trying to understand your kiln’s unique voice, this log book is the tool that turns experience into expertise.